Saturday, September 19, 2020

@Python(Data Structure Part-2)


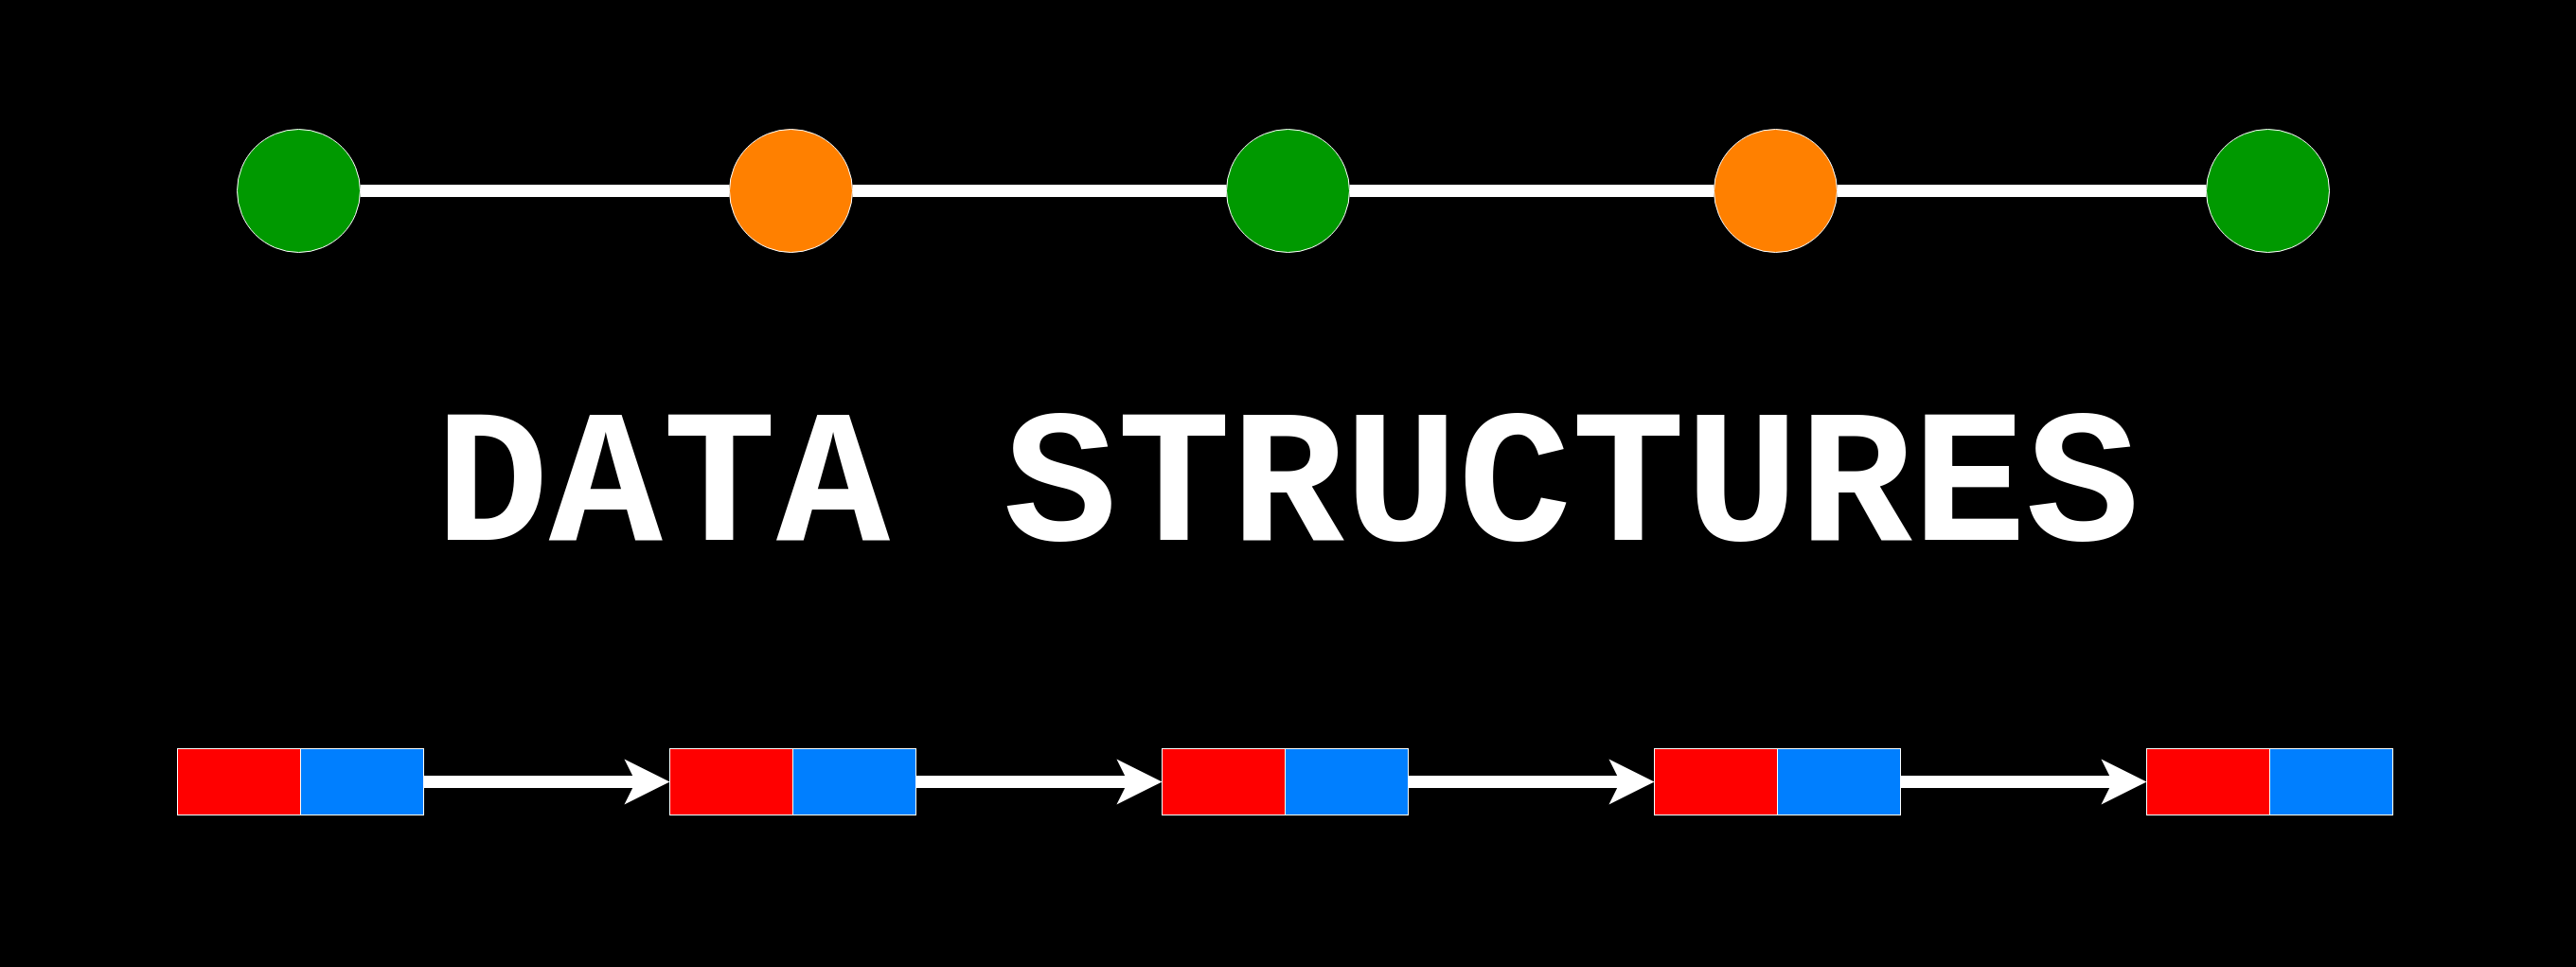
Hello, programmers in today's lesson we are going to learn about some advanced data structure. As we have already discussed data structure and variables in our previous lesson I would assume that you know the basics๐Ÿ˜„. So, in today's lesson, we are going to discuss all the linear data structures and their operations. The linear data structure is a type of data structure in which that data is stored sequentially.

Different types of the linear data structure are:

1.Linked list

2. Stack

3.Queue

What is a linked list?

A linked list is a type of data structure where it consists of n number of elements and each element has a data part and a pointer. The pointer points to the next element whereas the data part stores the data. A  pointer is nothing but a reference to the next element in python but this is not true for other programming languages such as C/C++ where a pointer is a variable that stores the address of other variables. We could visualize a linked list something like this:


Here, the linked list consists of 4 elements and each element has data and a next. The data part stores the data and the next is the pointer to the next element. Also, we have another pointer "Head" that points to the first element of the linked list. Now, let us write some code to create our own linked list in python.

#Node class
class Node:
  #Node class function
  def __init__(self,data):
    self.data = data #Assign data
    self.next = None #Assign pointer and initialize it as null
#class Linkedlist
class LinkedList:
  #Function to initialize Linked list 
  def __init__(self):
    self.head = None #pointer head pointing to the first node of linked list 

Here, In the Python code above we created a class Node which has a function containing data and a pointer. We initialized the pointer to be null as this is our first node and currently, it is not pointing to the next node. Also, we created another class LinkedList having a function that initializes the head pointer that points to the first node of the linked list. Now let us create some nodes and join them to actually make a linked list.

#Node class
class Node:
  #Node class function
  def __init__(self,data):
    self.data = data #Assign data
    self.next = None #Assign pointer and initialize it as null
#class Linkedlist
class LinkedList:
  #Function to initialize Linked list 
  def __init__(self):
    self.head = None #pointer head pointing to the first node of linked list
if __name__ == '__main__':
  first = LinkedList()
  first.head = Node(1)
  second = Node(2)
  third = Node(3)

We have created three nodes and those are first, second, and third. Here the first node contains the head pointer. Now let us join these three nodes.

#Node class
class Node:
  #Node class function
  def __init__(self,data):
    self.data = data #Assign data
    self.next = None #Assign pointer and initialize it as null
#class Linkedlist
class LinkedList:
  #Function to initialize Linked list 
  def __init__(self):
    self.head = None #pointer head pointing to the first node of linked list
if __name__ == '__main__':
  first = LinkedList()
  first.head = Node(1)
  second = Node(2)
  third = Node(3)
  first.head.next = second
  second.next = third 

Here we have joined the nodes using the next pointer and successfully created a simple linked list. Our linked list could be visualized as:


Linked List Traversal

We have created our linked list now let us traverse the linked list and print all data stored in each node. For traversal, we are going to write a print_list() function something like this:

#Node class
class Node:
  #Node class function
  def __init__(self,data):
    self.data = data #Assign data
    self.next = None #Assign pointer and initialize it as null
#class Linkedlist
class LinkedList:
  #Function to initialize Linked list 
  def __init__(self):
    self.head = None #pointer head pointing to the first node of linked list
  def print_list(self):#Function for traversal
    temp = self.head # Intializing a temp variable with the head pointing to the first node
    while(temp):
      print(temp.data) #Printing all the data in each node
      temp = temp.next #pointing to the next node after printing the first node 
if __name__ == '__main__':
  first = LinkedList() # Created a linked list with the first node
  first.head = Node(1) #Inserting value to the node
  second = Node(2)
  third = Node(3)
  first.head.next = second # pointing to the second node
  second.next = third #pointing to the third node
  first.print_list() # Calling the print_list() function


And our output should look like:


 Here In the python code above we have written a print_list() function. And the print list function has a variable temp that points to the first node of the list and it traverses through each node and prints the value stored inside the node. It is important to note that we have to call our print_list() function in our main function to execute it.    

Insertion of a node in a linked list:

We have already discussed how a linked list is created and traversed. Now let us see how can we add a node inside a linked list at different positions. Here we will discuss:

1. Adding a node at front of the linked list:

Here we are going to add a new node at the front of the linked list and move the head pointer to our new node as this node would now be our first node in the linked list. The python code for the following is shown below:

#Node class
class Node:
  #Node class function
  def __init__(self,data):
    self.data = data #Assign data
    self.next = None #Assign pointer and initialize it as null
#class Linkedlist
class LinkedList:
  #Function to initialize Linked list 
  def __init__(self):
    self.head = None #pointer head pointing to the first node of linked list
  def print_list(self):#Function for traversal
    temp = self.head # Intializing a temp variable with the head pointing to the first node
    while(temp):
      print(temp.data) #Printing all the data in each node
      temp = temp.next #pointing to the next node after printing the first node
  def push(self, new_data):# Function to add new node at the beginning 
    new_node = Node(new_data)  # New node created
    new_node.next = self.head # Moving the head pointer to the next node after our new node
    self.head = new_node # Placing the head pointer to our new node.    
if __name__ == '__main__':
  first = LinkedList() # Created a linked list with the first node
  first.head = Node(1) #Inserting value to the node
  second = Node(2)
  third = Node(3)
  first.head.next = second # pointing to the second node
  second.next = third #pointing to the third node
  first.push(0) #Calling the push function
  first.print_list() # Calling print_list() 

Here we created a new function push in the class LinkedList. And our function:

1. first creates a new node with data as an argument. 

2. Secondly, it moves the head pointer to the next node after our new node. This step is done to join the linked list with our new node.

3. It moves the head pointer to our new node.

Finally, we can see the output as:


2. Adding a node after a given node:

We have already discussed how to add a node at the beginning of the linked list. Now let us see how to add a node after any given node. 

#Node class
class Node:
  #Node class function
  def __init__(self,data):
    self.data = data #Assign data
    self.next = None #Assign pointer and initialize it as null
#class Linkedlist
class LinkedList:
  #Function to initialize Linked list 
  def __init__(self):
    self.head = None #pointer head pointing to the first node of linked list
  def print_list(self):#Function for traversal
    temp = self.head # Intializing a temp variable with the head pointing to the first node
    while(temp):
      print(temp.data) #Printing all the data in each node
      temp = temp.next #pointing to the next node after printing the first node
  def insert_after(self,prev_node,new_data):
    if prev_node is None: #check if prev_node is linked to the next node
      print("Prev_node must be linked")
    new_node = Node(new_data)#Create a new node with new_data as args
    new_node.next = prev_node.next#Move the prev_node pointer to the new_node  
    prev_node.next = new_node#make the prev_node point to the new_node     
if __name__ == '__main__':
  first = LinkedList() # Created a linked list with the first node
  first.head = Node(1) #Inserting value to the node
  second = Node(2)
  third = Node(3)
  first.head.next = second # pointing to the second node
  second.next = third #pointing to the third node
  first.insert_after(second,4) #Calling insert_after function
  first.print_list() # Calling print_list() 

In the python code above we have created a new function insert_after that inserts a new node after any given node. Here:
 1. We check if the previous node is linked or not.

2. Then we assign the pointer of the previous node to the new node.

3. At last, we make the previous node point to the new node.

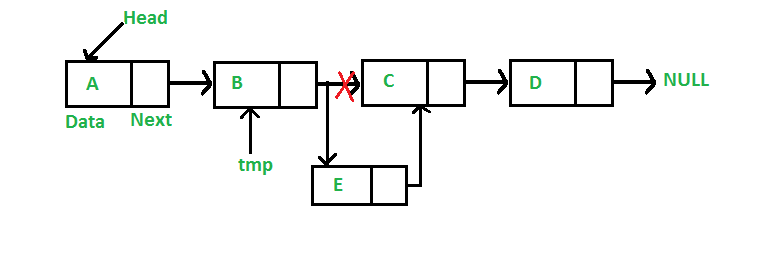
This whole process can be visualized as:


Source: GeeksforGeeks

And our output for the above program would be:

                        
3. Adding a node at the end of the linked list:

Now let us discuss on how to add a node at the end of the linked list. Something like this:


Source: GeeksforGeeks

The python code for the method is shown below:

#Node class
class Node:
  #Node class function
  def __init__(self,data):
    self.data = data #Assign data
    self.next = None #Assign pointer and initialize it as null
#class Linkedlist
class LinkedList:
  #Function to initialize Linked list 
  def __init__(self):
    self.head = None #pointer head pointing to the first node of linked list
  def print_list(self):#Function for traversal
    temp = self.head # Intializing a temp variable with the head pointing to the first node
    while(temp):
      print(temp.data) #Printing all the data in each node
      temp = temp.next #pointing to the next node after printing the first node
  def add_last(self,new_data):
    new_node = Node(new_data) #create a new node
    if self.head is None:#If the list is empty 
      self.head = new_node#Then make head point to new_node
      return
    last = self.head# Else traverse to the last node
    while(last.next):
      last = last.next
    last.next = new_node# Make the last node point to the new node         
if __name__ == '__main__':
  first = LinkedList() # Created a linked list with the first node
  first.head = Node(1) #Inserting value to the node
  second = Node(2)
  third = Node(3)
  first.head.next = second # pointing to the second node
  second.next = third #pointing to the third node
  first.add_last(4) #Calling insert_after function
  first.print_list() # Calling print_list()

Here we have created  a function add_last that does the following:

1.Creates a new node

2.If the list is empty then make the head point to the new node

3.Else it traverses to the last node and makes the last node point to the new node.

The output for the following program is shown below:


 We have learned all about how to add a node at different positions of the linked list now let us discuss how to remove a node from a different positions in the linked list. So, a node can be removed from the linked list by the following ways:

1. Deleting a node by using a key value:

We can delete a node in a linked list using a key value as input. That means you already know the value in your linked list and you want to delete a particular value from the linked list. The python program to delete a node using a key is shown below:

# Node class 
class Node: 

	# Constructor to initialize the node object 
	def __init__(self, data): 
	    self.data = data 
	    self.next = None

class LinkedList: 

	# Function to initialize head 
	def __init__(self): 
	    self.head = None

	# Function to insert a new node at the beginning 
	def push(self, new_data): 
	    new_node = Node(new_data) 
	    new_node.next = self.head 
	    self.head = new_node 

#Function to delete a node by using the key value
	def deleteNode(self, key):
 
		
		# Store head node into a temp variable
            temp = self.head 

		# If head node itself holds the key to be deleted 
	    if (temp is not None): 
	        if (temp.data == key): 
	            self.head = temp.next
		    temp = None
		    return

		# Search for the key to be deleted, keep track of the 
		# previous node as we need to change 'prev.next' 
		while(temp is not None): 
		    if temp.data == key: 
		        break
		    prev = temp 
		    temp = temp.next

		# if key was not present in linked list 
		if(temp == None): 
		    return

		# Unlink the node from linked list 
		prev.next = temp.next

		temp = None


	#Function to print the linked LinkedList 
	def printList(self): 
	    temp = self.head 
	    while(temp): 
	        print(" %s" %(temp.data)) 
		temp = temp.next


if __name__ == '__main__':

  llist = LinkedList() 
  llist.push('a') 
  llist.push('b') 
  llist.push('c') 
  llist.push('d') 
  print ("Created Linked List: ") 
  llist.printList() 
  llist.deleteNode('b')#calling function deleteNode with b as key 
  print ("\nLinked List after Deletion of b:") 
  llist.printList() 

In the python code above we have created a function delete node that takes a key value as an argument and does the following:

1. Stores the head pointer to a temp variable

2. If the key value is stored in the first node itself then it temp.next stores the self.head and the temp value is removed eventually. 

3. If the key value is stored at any other location then, we keep the track of the previous node. Store the temp variable into another variable prev and assign the temp.next value to temp. This is necessary because due need to change the prev.next

4. Then we unlink the node to be deleted by the link list and release the memory allocated to temp.

The output for the following program would be:


2. Deleting a node using the position in the linked list:

We have learned about how to delete a node using the key value. Now let us discuss how to remove a node using its position in the linked list. The python program for the following is shown below:

# Python program to delete a node in a linked list 
# at a given position 

# Node class 
class Node: 

	# Constructor to initialize the node object 
    def __init__(self, data): 
    self.data = data 
    self.next = None

class LinkedList: 
	# Constructor to initialize head 
        def __init__(self): 
	   self.head = None

	# Function to insert a new node at the beginning 
	def push(self, new_data): 
	    new_node = Node(new_data) 
	    new_node.next = self.head 
	    self.head = new_node 

	# Given a reference to the head of a list 
	# and a position, delete the node at a given position 
	def deleteNode(self, position): 

		# If linked list is empty 
		if self.head == None: 
		    return

		# Store head node in a temp variable
		temp = self.head 

		# If head needs to be removed 
		if position == 0: 
		    self.head = temp.next
		    temp = None
		    return

		# Find previous node of the node to be deleted 
		for i in range(position -1 ): 
			temp = temp.next #temp variable stores the temp.next value
			if temp is None: 
				break

		# If position is more than number of nodes 
		if temp is None: 
			return
		if temp.next is None: 
			return

		# Node temp.next is the node to be deleted 
		# store pointer to the next of node to be deleted 
		next = temp.next.next

		# Unlink the node from linked list 
		temp.next = None

		temp.next = next


	# Function to print the linked LinkedList 
	def printList(self): 
		temp = self.head 
		while(temp): 
		    print(" %d " %(temp.data)), 
		    temp = temp.next


if __name__ =='__main__':

  llist = LinkedList() 
  llist.push(1) 
  llist.push(2) 
  llist.push(3) 
  llist.push(4) 
  llist.push(5) 
  print("Created Linked List: ")
  llist.printList() 
  llist.deleteNode(4) 
  print("\nLinked List after Deletion at position 4: ")
  llist.printList() 
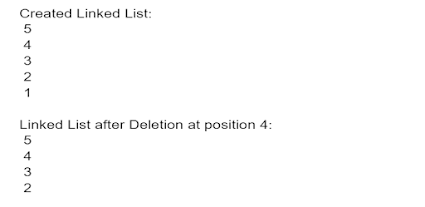
And the output for the following program would be:


Now let us discuss the deleteNode function above:

1. The deleteNode function takes one argument and that is the position of the node to be deleted. 

2. It checks if the linked list is empty. If it is empty it exits the function as we cannot delete an empty node.

3. It stores the head pointer into a temp variable. And if the first node has to be deleted then we move the head pointer to the next node of the first node and remove the first node.

4. Else, if the position to be deleted is other then first node then we find out the previous node of the node that is to be deleted and store it in a temp variable.

5. Since we know the previous node then it is obivious that the node to be deleted would be the temp.next node. And hence we need to link the next node of temp.next to its previous node. At last, we remove the temp.next node and free the memory on temp variable.

Well, that was all about inserting and deleting a node in a linked list. Now, let us discuss about differtent types of linked list:

Doubly Linked List:

Circular Linked List:


Friday, September 18, 2020

@Python(Object-Oriented programming)


Hello programmers, so today we are going to learn about Object-oriented programming(OOP in short).

And in today's lesson we are going to learn about:

1. What is OOP?

2. Why do we need OOP?

3. How to efficiently use OOP to do awesome stuff in python. 

What is OOP?

OOP is a programming method where coders/developers write code by creating classes and objects. Now, you might be thinking about what are classes and objects. Consider an example that you came for an industrial visit to the Tesla car factory. And you are inside the production line section of the factory and you noticed certain things about how a Tesla Model 3 car is being made. And those things are:

1. All Tesla Model 3 car was being made by robots.

2. Different robots are doing a certain specified task given to them at different sections in the production line where the raw materials were provided to them.

3. Tesla Inc. engineers were using python to instruct their robots to do their tasks.


Now let us recap on the things required to make a Tesla Model 3 car. We would be very discrete on this as too many components would be complicated to understand. So, What do we need to make a car?

1. Engine(Electric)

2. Body

3. Wheels

So, while making a Tesla Model 3 car, you noticed that the robots at Tesla Inc. were first making the engine, secondly, they were fitting the body, and lastly, they added the wheels.

Now, let us see how python helped Tesla Inc. engineers to make Tesla Model 3 cars. So, in python codes can be written in Classes and Objects. A class is a prototype of the car and programmers define or structure the prototype on how the car is going to be made. A class in python is defined by the keyword Class followed by the name of the class Eg:


Here a class is defined as Tesla model 3 and we are going to add some methods of instruction to the class so that the robots at Tesla could understand it.

As we can see just below the class there is a keyword "pass" now pass means that you have declared a class with the name Tesla_model_3 and you are going to add some method to it. When you are done doing that I(@python) will read the next line of code. Now let us look at what are methods.

What are the methods?

Methods are different types of functions that are used to perform the specific task inside a class. For eg. we are going to make an engine and add it to our car and similarly the other parts. The method is written as:


Here "def" is the declaration that a method is being used followed by the method name and the arguments of the method. We are going to define some methods to make our Tesla car.


Here we defined a method named __init__, this is a python reserve method to initialize the attribute to the class. It can also be called as a constructor because it can construct objects that are the instance of the class. This means that it is basically a prototype designed to create objects and in our case, it would be Tesla Model 3 cars.

Now let us create the prototype of our Tesla_model_3 cars. And in python you have to write the following codes:


We have finally written the prototype to create a tesla car. And here we have given four arguments inside the __init__ class and these are self, engine, body, and wheels. The self is a reference to the current instance of the class. It is used to access the variables inside the class and our engine, body, wheels are our variables."Self " keyword helps me(@python) reference the variable used by you. But till now we have just created the prototype of our car now let us actually create some cars.!!!!๐Ÿ˜„๐Ÿ˜Ž

To create a Tesla Model 3 car we just need to write our class name along with the arguments needed. Something like this:

So, we have created a Tesla model 3 car giving it a name car1 and it has an Electric motor as its engine with an aluminum body and 18" wheels. It is important to note that once you have created an object or car in our case then each object has its unique properties as given to them. For Eg. the robots at Tesla would create a certain number of cars every day and mark them as car1, car2, car3, etc. Here each car is unique and car1!=car2(!=  means not equal). Also, while storing the objects in the computer the computer would store each object in different memory locations and as we can see above a funny-looking word "0x7f9c70aa5240" this is the memory address where our object is stored. And a memory address is just the address inside the computer where our object is stored on the computer.

And once the object is created it is the instance of the class. So, our final product car1, car2, and car3
are shown below: 


Also, to find out the instance attribute of an object we can use a dot notation something like this:


Here we have two car car1 and car2 and we used dot notation to find our car1 engine type and car2 body type. Similarly, we can find any attribute by calling it through a dot operator.

What is Instance methods?

Now, suppose after knowing the process of making a Tesla model 3 car you came up with an idea that maybe you could add an Artificial Intelligence software to your car and you approached a Tesla engineer to implement your idea. So, the Tesla engineers wrote a code something like this:


Here, in the python code above we can see that our class Tesla_model_3 has a new method Jarvis which is our new AI added to the car. Also, Jarvis takes an argument that is your name to get activated. It is important to note that: 
1. These kinds of methods are known as Instance methods and can be accessed only within the instance of the class.
2. Even while defining an instance method you need to use the "self" keyword as an argument.

What is the class attribute?

A class attribute is an attribute that has the same value and applies to all the instance objects created by its class. For eg. It is known to us that all the Tesla cars would have the same logo irrespective of its model. And hence we can define the attribute logo in the class Tesla_model_3 something like this:


Here in the python code, we can notice that a variable logo is defined in the class Tesla_model_3 and this variable is not inside any methods. This variable is known as a class attribute.

What is Inheritance?

Inheritance is the method of inheriting the property from its parent class to child class. Now, what is a parent class and child class? Consider an example that Tesla model 3 and Tesla Model S have the same car components only that Tesla model S had a tinted window. So, the engineers at Tesla used inheritance property of the class Tesla_model_3 to extend its attribute to the child class Tesla_model_s. Something 
like this:


Here we created a new car named car1 which is a Tesla Model S. Tesla Model S is a child class of Tesla model 3 and the Tesla Model S has its own class attribute window which is tinted and has the attributes of the parent class that is Tesla_model_3. You could add different functions or methods to the child's class.

What is method overriding?

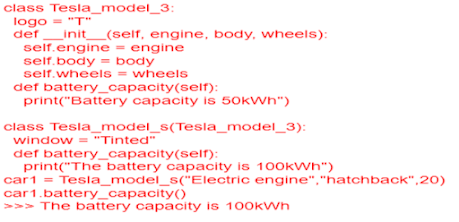
Method overriding in python is overriding the methods in the parent class by the child class. Method overriding is done by defining the same method in the child class but with its own desired properties. For eg. 


In the python code above the child class Tesla_model_s, we defined a method battery_capacity but the same method was declared in the parent class Tesla_model_3. And while using the dot operator to find what is the battery capacity of Tesla_model_s it returned the value of as defined in its own class and not in the parent class. So we can say that the child class Tesla_model_s has overridden the method battery_capacity and this is known as method overriding. It is important to note that the other attributes remain the same for the child class Tesla_model_s such as the engine, body, and wheels.

What is multilevel Inheritance?

Multilevel Inheritance is the method where a child class inherits the attribute from its grandparent. For eg. 


Here in the python code above, there are three classes Tesla_model_3, Tesla_model_s, and tesla_model_x, and the class tesla_model_x is the grandchild of class Tesla_model_3. As we can see that the class tesla_model_x inherited the attribute battery_capacity from its parent class Tesla_model_s and it also has all the other attribute property from the class Tesla_model_3.

What is Multiple Inheritance?

Multiple Inheritance is the method where a class is derived from more than one base class. For eg.


In the python code above the class, tesla_model_x is derived from the classes Tesla_model_3 and  Tesla_model_s. But it has overridden the method battery_capacity which was declared in the parent class Tesla_model_s. This is known as multiple inheritances.

What is the super() method?
The super() method in python is a pre-defined method in python that allows explicit access to the methods in the parent class. For eg.


In the python code above, the class tesla_model_x has a super() method that returns the value of the method in the class Tesla_model_s as declared above.

What is Polymorphism?

Polymorphism is the method in which we use the same method name but with different functionality.
For eg:


In the python code above we have declared two methods with the same name but in a different class and two objects, car1 and car2 were created. When we used the dot operator to find the battery capacity of the car it returned the value of its individual class. You might ask why is the method not overriding it is because we have created two different objects from different classes. 

Why do we need OOP?

OOP is required because:

1. It creates a modular structure of programs and the code looks more cleaner.
2. It makes maintaining of codebase easier.
3. It binds together the data and the function that operates on them so that no other part of the code can access  this data except that function. This is known as encapsulating data.


Well, and that was it, you have learned a lot about OOP today. We can use OOP to create awesome projects in python๐Ÿ˜‰.  To know more about it follow me on Imagination


Monday, September 14, 2020

@Python(Data Structure&Variables)

What are Data Structure & Variables?

Hello programmers, so today we are going to learn about data structure and variables in python. Data structures are a way of organizing our data on the computer it's very much like organizing our things in our living hall or room Consider an example that you have a collection of books of different authors and genres and you want to keep all your books organized on the bookshelf so that it looks neat๐Ÿ˜Ž and easier for you to get whatever book you want. Suppose your bookshelf looks something like this.

Now for the ease of finding your books you numbered the position of each book placed on your bookshelf. Something like this:

Here you have created a data structure for yourself in your home. Smart move!!๐Ÿ˜‰ and since you are pretty intelligent you can read the label of your book or you just know that your chemistry book is dark blue in color. But that not the case for me(@python). As you see, I don't know how to read to get English and that to from the computer. And Believe me, that thing only understands the language of binary or 0s and 1s. So it is difficult to communicate with computers in English but we could come up with a strategy so that both you and I can communicate with it. Suppose you asked me to get the book in the 4th position on your bookshelf I would do it without any hesitation ๐Ÿ˜Š. As you know it is easier for me to interpret numbers to binary. There are various ways in which you could store your data on the computer and it is easier for me to access it for you. Example, you could store it in a Key:Value pair where the value is your data and the key is a unique number to access it.  So, to sum up, a data structure is nothing but a structure to store your data on the computer, and in this case, your bookshelf would be your data structure and your books are your data. There are different kinds of data structure  that python uses like:
1. Lists
2. Dictionary
3. Sets
 and I will be explaining all of these to you. But before that, "do you know what is data"?

Data is nothing but information stored in a system/computer. Like your book which contains specific facts and knowledge about a story or a lesson. Although the computer stores data in a different manner it stores it in a binary format(0s_and_1s) and believe me it's difficult to understand that. But, you don't need to worry about that as I will handle it๐Ÿ˜Š. You just need to instruct me that way I am going to ask you to. So, we are going to start our lesson here.
What is a Variable?
Variable is a reserved memory location on the computer. Now, a reserved memory location on a computer is like your space in your bookshelf for each book. Something like this:


Here each small box in your bookshelf can be called a memory location I have marked M1, M2, M2......M18 so, that it is easier for you to understand. And each small box of your bookshelf contains a book that has certain information which is our data. Also, you can add/remove or replace data from your memory locations in your computer same as adding/removing or replacing books from your bookshelf. But to use a variable you have to declare it first on your computer.

What is the Variable Declaration?

Variable declaration is nothing but informing the computer that we are going to need a memory location to store our data and we would name the memory location using different variable names.

Click here to know about python_variable_naming


In the python code as shown above. Here x and y is your variable name having values 9 and 22.
Now, the computer stores data in different formats or types such as integer, float, string, etc. these are known as data types in python.

What are Data types?

Data types are basically the different types or classifications of data items.
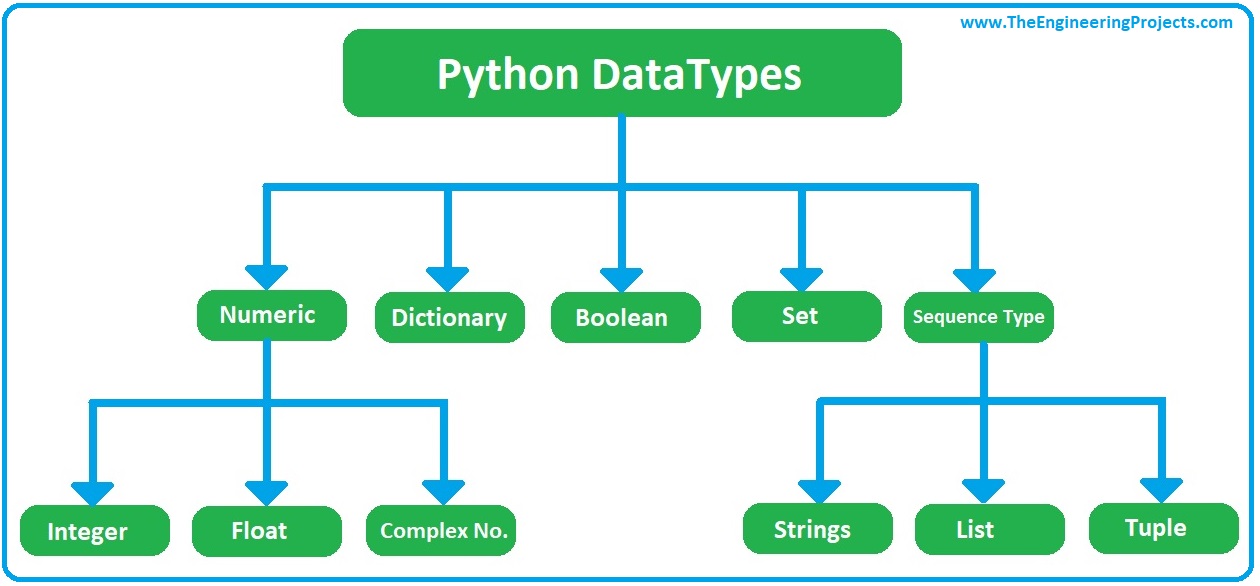
Such as an integer(0,1,2..n) or string(sequence of characters). To understand these consider an example in your daily life you classify your information so that it is easy for you to memorize it. Such as, you know that a phone number will always be in integer you will not mistake a phone number to be alphabets or string as we say in python. In the same way, even python classifies its data so that it is easier for us to access or modify our data  There are different types of data types in Python and these can be classified as:


"We are going to go through each data types in python"

  •  Numeric: It represents all data having numeric value. A numeric value can be classified as:
1.Integer: It contains positive or negative whole numbers without fraction or decimal(Eg. 1,2,5 etc.).


2.Float: It contains real numbers with fraction or decimal and has floating point representation Eg(1.2,1.345,3.14 etc.).

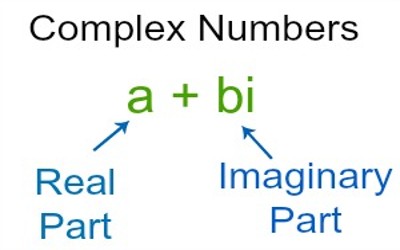
3.Complex: It contains two parts which are classified as real part and imaginary part(Eg. x+yj). These are usually used for mathematical calculation.


  • Sequence: Sequence is the ordered collection of similar or different data types. Sequences allow storing multiple values in an organized manner. There are several sequence types in Python – 

 1. String Strings are arrays of bytes representing Unicode characters. A string is a collection of one or more characters put in a single quote(' '), double-quote(" ") or triple quote. 

For example, "Apple", "BMW" etc. anything that with a sequence of characters. In this case, the characters are English alphabet.

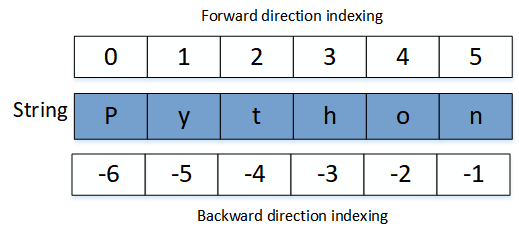
And each character are indexed for better access as shown:


 2. Lists: Lists are just like the arrays, declared in other languages which is a ordered collection of data. It is very flexible as the items in a list do not need to be of the same data type.


                   In python list is written as:

                  List = ["Pen", "Pencil", "Notebook"]


3. Tupletuple is a collection of objects which ordered and immutable. Tuples are sequences, just like lists. The differences between tuples and lists are, the tuples cannot be changed unlike lists.


                   In python tuple is written as:

                  Tuple = ("Pen", "Pencil", "Notebook")

  • Boolean: The boolean data type is either True or False. In Python, boolean variables are defined by the True and False keywords 


  • Setsset is an unordered collection of items. Every set element is unique (no duplicates) and must be immutable (cannot be changed). However, a set itself is mutable. We can add or remove items from it. Sets can also be used to perform mathematical set operations like union, intersection, symmetric difference, etc.            


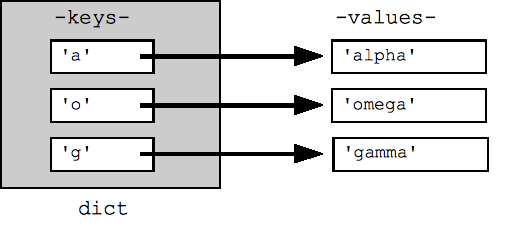
  • Dictionary: A dictionary is a collection that is unordered, changeable, and indexed. In Python, dictionaries are written with curly brackets, and they have keys and value.


Abstract Data types:

Before defining abstract data types, let us consider the different views of system-defined data types. We all know that, by default, all primitive data types (int, float, etc.) support basic operations such as addition and subtraction. The system provides the implementations for the primitive data types. For user-defined data types, we also need to define operations. The implementation for these operations can be done when we want to actually use them. That means, in general, user-defined data types are defined along with their operations. To simplify the process of solving problems, we combine the data structures with their operations
and we call this Abstract Data Types (ADTs). An ADT consists of two parts:

1. Declaration of data
2. Declaration of operations

Commonly used ADTs include Linked Lists, Stacks, Queues, Priority Queues, Binary Trees, Dictionaries, Disjoint Sets (Union and Find), Hash Tables, Graphs, and many others. For example, the stack uses the LIFO (Last-In-First-Out) mechanism while storing the data in data structures. The last element inserted into the stack is the first element that gets deleted. Common operations of it are: creating the stack, pushing an element onto the stack, popping an element from the stack, finding the current top of the stack, finding the number of elements in the stack, etc. While defining the ADTs do not worry about the implementation details. They come into the picture only when we want to use them. Different kinds of ADTs are suited to different kinds of applications, and some are highly specialized to specific tasks. 

And that's all you needed to know about data structures and data types in python. Now we are going to use these data structures and do some awesome stuff in python ๐Ÿ˜„

To learn more about me follow me at just_0s_and_1s


React.js

  To create a new React app, you can use the create-react-app command line tool. First, make sure you have Node.js and npm (Node Package Ma...